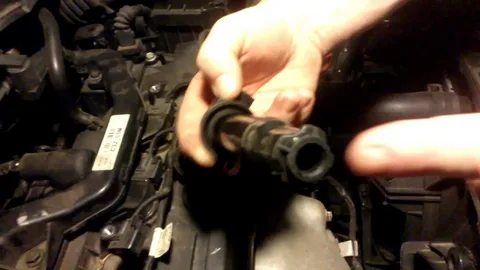
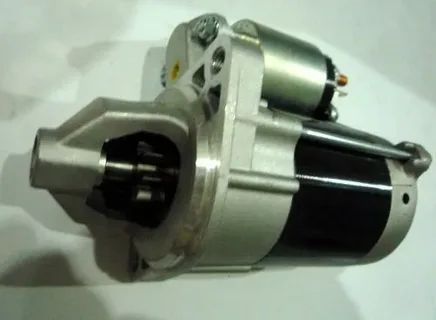
The 2009 Kia Rio Coil is an integral component that facilitates the engine’s firing process. It essentially transforms the low voltage from the car battery into the high voltage required to ignite the fuel-air mixture within the engine cylinders. Without a properly functioning ignition coil, the engine’s performance would be severely compromised, potentially leading to a host of issues such as misfires, reduced fuel efficiency, and even complete engine failure. The ignition coil works in tandem with other parts of the ignition system, such as the spark plugs and leads, to ensure the engine runs efficiently and smoothly.
Introduction to the Coil in the 2009 Kia Rio
Understanding the importance of the ignition coil and its role can help Kia Rio owners preemptively address any issues before they escalate. This part can be particularly susceptible to wear and tear due to its constant exposure to high temperatures and electrical currents. Over time, the coil’s efficiency can degrade, leading to symptoms that might initially seem minor but can develop into more severe problems if left unaddressed.
Maintaining awareness of the ignition coil’s condition is not just about ensuring immediate performance but also about prolonging the vehicle’s life. Routine inspections and timely replacements, when necessary, can help maintain the overall health of the ignition system. The ignition coil is a small yet mighty component crucial for the vehicle’s overall functioning and reliability.
Recognising Issues with the 2009 Kia Rio Coil Pack
Recognising issues with the 2009 Kia Rio Coil Pack can help you address problems before they become severe. One of the primary symptoms of coil pack issues is engine misfires, which can manifest as a stuttering or jerking sensation during acceleration. Another tell-tale sign is reduced fuel efficiency; if you notice your fuel consumption increasing without changing your driving habits, the coil pack might be at fault.
Difficulty starting the vehicle is another common symptom. If your Kia Rio struggles to start or requires multiple attempts, the ignition coil could be the culprit. Additionally, drivers may experience a rough idle, where the engine feels unstable or vibrates excessively while the car is stationary. Engine stalling, where the engine suddenly shuts off while driving or idling, is a more severe symptom that should be addressed immediately.
While these symptoms are relatively common, they can also indicate issues with other ignition system components, such as spark plugs or leads. Therefore, a thorough diagnosis is necessary to pinpoint the exact cause. By staying vigilant for these signs, Kia Rio owners can ensure their vehicle remains in top condition, preventing further complications and maintaining optimal performance.
Identifying Problems with the 2010 Kia Rio Coil Pack
Diagnosing issues in your 2010 Kia Rio Coil Pack requires a few essential tools: a multimeter, a spark plug tester, and possibly a diagnostic scanner. Begin by visually inspecting the coil for any apparent damage or corrosion. Cracks, burn marks, or oil contamination can indicate a faulty coil. Next, the multimeter is used to test the coil’s primary and secondary winding resistance, comparing the readings against the manufacturer’s specifications. Variations from the specified range can signal a malfunctioning coil.
A spark plug tester can help confirm whether the coil is generating a sufficient spark. Attach the tester to the ignition coil and observe the spark quality. A weak or inconsistent spark suggests an issue with the coil. A diagnostic scanner can also read error codes from the vehicle’s onboard computer. Codes such as P0350-P0362 generally point to problems within the ignition system, including the coil.
Check the coil’s electrical connectors and wiring for signs of wear, corrosion, or loose connections. Faulty wiring can sometimes mimic coil failure symptoms. By methodically testing and inspecting these components, you can accurately diagnose whether the coil is the source of your vehicle’s issues or if another part of the ignition system needs attention. This approach helps prevent misdiagnosis and ensures that any repairs will effectively resolve the problem.
Solutions for Repairing or Replacing the 2011 Kia Rio Coil Pack
If the 2011 Kia Rio Coil Pack shows signs of significant wear or malfunction, replacement is generally the most effective solution. To guarantee compatibility and longevity, begin by sourcing a high-quality replacement part, ideally an OEM (Original Equipment Manufacturer) coil pack. Before installation, ensure you have the necessary tools, including a ratchet set, a screwdriver, and possibly a torque wrench for securing bolts to the manufacturer’s specifications.
First, disconnect the car battery’s negative terminal to prevent any electrical hazards. Next, locate the coil pack, usually near the engine’s top, attached to the spark plugs via ignition leads. Carefully remove the ignition leads, marking their positions for accurate reconnection. Then, unbolt the coil pack from its mountings and disconnect any electrical connectors.
With the old coil pack removed, compare it to the new one to ensure correct sizing and connector types. Attach the new coil pack by reversing the removal process: secure it with bolts, reconnect the electrical connectors, and attach the ignition leads to their corresponding spark plugs. Double-check all connections for tightness and accuracy.
After installation, reconnect the battery and start the engine. Listen for smooth operation and check for any warning lights on the dashboard. The installation was successful if the vehicle runs smoothly without any warning indicators. Sometimes, a brief test drive can confirm that the new coil pack is functioning correctly.
While DIY replacement is feasible for those with basic mechanical skills, consider consulting a professional mechanic if you encounter difficulties or lack confidence in the process. Proper installation ensures the new coil pack performs optimally, contributing to the overall health and efficiency of your Kia Rio’s ignition system.
Preventative Maintenance Advice for the Coil Pack in a 2011 Kia Rio
Maintaining the coil pack in your 2011 Kia Rio ensures optimal engine performance and prevents costly repairs. The coil pack is a critical component in your vehicle’s ignition system, responsible for converting battery voltage into the high voltage needed to ignite the spark plugs. Here are five preventative maintenance tips to help extend the lifespan of your Kia Rio’s coil pack:
Regularly Inspect Spark Plugs and Wires
Faulty or deteriorated spark plug wires can put additional stress on the coil pack, causing it to overwork and potentially fail. Inspecting these components regularly for signs of wear, such as corrosion, cracks, or carbon buildup is essential.
Keep the Coil Pack Clean and Dry
Moisture can be a major enemy of the coil pack, as it can cause corrosion or short circuits. Regularly check the coil pack for dirt, oil, or moisture signs. If you notice any, clean it gently with a dry cloth. If the coil pack is exposed to excessive moisture, it may lead to misfires or ignition issues. Ensuring the coil pack and surrounding areas are clean and dry can help maintain optimal function and prevent electrical problems.
Avoid Excessive Heat Exposure
Excessive heat is a common cause of coil pack failure, as it can damage the internal components and reduce efficiency. To prevent overheating, ensure that the cooling system of your Kia Rio is in good working order. Additionally, check the coil pack’s mounting location for proper heat shielding.
Use High-Quality Fuel and Additives in 2011 Kia Rio Ignition Coil Replacement
Using high-quality fuel can help prevent carbon deposits from building up in the 2011 Kia Rio Ignition Coil Replacement system, which can indirectly affect the coil pack’s performance. Additionally, consider using fuel additives that clean the fuel injectors and combustion chamber. Safe Replacement Tips for the Ignition Coil in a 2011 Kia Rio
When replacing the ignition coil in your 2011 Kia Rio, safety and precision are paramount. Begin by ensuring the vehicle is parked on a level surface and the engine has cooled down to avoid burns. Disconnect the negative battery terminal to eliminate any risk of electrical shock during the replacement process. Locate the ignition coil, typically positioned near the engine’s top and connected to the spark plugs via ignition leads.
Before removing the old coil, take note of the current configuration and the positioning of all connectors and leads. This step is crucial for ensuring accurate reinstallation. Using the appropriate tools, carefully unbolt the coil from its mountings and disconnect any attached electrical connectors and ignition leads. If the leads are marked, it can simplify the reconnection process later on.
Once the old coil is removed, compare it with the new coil to confirm correct sizing and connector types. Attach the new ignition coil by reversing the removal steps: secure it in place with bolts, reconnect the electrical connectors, and attach the ignition leads to their corresponding spark plugs. Ensure all connections are tight and secure to avoid any issues once the engine is running.
After the new coil is installed, reconnect the battery terminal and start the engine. Listen for smooth operation and check for any warning lights on the dashboard. A brief test drive can help confirm that the new ignition coil is functioning correctly, ensuring your Kia Rio runs smoothly.
Conclusion
Regular upkeep of the 2009 Kia Rio’s ignition coil is vital for maintaining vehicle performance and preventing unexpected breakdowns. By incorporating routine checks into your maintenance schedule, you can identify and address potential issues early, thus avoiding costly repairs and ensuring a more reliable driving experience. Simple tasks, such as inspecting the coil for visible damage and using diagnostic tools to monitor its performance, can make a significant difference in the long run. By remaining proactive, you ensure that your vehicle runs smoothly and efficiently, offering you peace of mind and a more enjoyable driving experience.
Frequently Asked Questions
Q: How often should I check my 2009 Kia Rio Coil?
A: It’s recommended to inspect the ignition coil during each service interval or at least once a year.
Q: Can a faulty coil affect fuel consumption?
A: Yes, a failing coil can lead to poor combustion efficiency, increasing fuel consumption.
Q: Is it necessary to replace all coil packs if one fails?
A: Not always, but if one coil pack fails, others may follow, so consider replacing them as a set, especially if they are of the same age.
Q: Are aftermarket coils a good choice for replacement?
A: While some aftermarket coils may work well, using OEM parts is advisable to ensure compatibility and longevity.
Q: Can I replace the ignition coil myself?
A: Yes, if you have basic mechanical skills and the necessary tools, you can replace the ignition coil yourself. However, if you encounter difficulties or lack confidence, it’s best to consult a professional mechanic.
Q: How can I test if my ignition coil is faulty?
A: You can use a multimeter to measure the coil’s resistance and compare the readings to the manufacturer’s specifications. Additionally, a spark plug tester and diagnostic scanner can help identify issues.
Q: Will a new ignition coil improve my car’s performance?
A: A new ignition coil can improve engine performance if the old one was faulty. It can lead to smoother operation, better fuel efficiency, and more reliable starting.


