If you own a VZ Commodore, you know the comfort of cruising with the air conditioning on full blast during those hot summer days. But what happens when your AC starts blowing warm air instead? It might be time to consider replacing the VZ Air Conditioning Compressor. This essential component keeps you cool and comfortable by circulating refrigerant through your system. Replacing it may sound daunting, but with a little guidance and some handy tools, it’s quite manageable.
Tools and Materials Needed
Before replacing your VZ air conditioning compressor, gather all necessary tools and materials. This will streamline the process and help avoid unnecessary delays.
Start with basic hand tools: a socket set, wrenches, and screwdrivers in various sizes are fundamental for loosening bolts and removing components. A torque wrench ensures everything is tightened to manufacturer specifications when reassembling.
Next, consider specialized tools like an AC manifold gauge set. This device allows you to check pressure levels in the system before and after replacement. A vacuum pump may also be needed; it removes moisture from the system, preventing damage during operation.
Remember safety gear, too! Gloves protect your hands, while goggles shield your eyes from debris or refrigerant splashes. Additionally, you’ll need refrigerant oil to lubricate the new compressor. Having these items ready will make the replacement process smoother and more efficient.
Safety Precautions
Before diving into the replacement process, it’s crucial to prioritize safety. Working on your vehicle can pose various risks, especially when dealing with air conditioning systems. Always wear protective gear such as gloves and goggles to safeguard yourself against sharp edges and potential refrigerant leaks.
Ensure that you’re working in a well-ventilated area. This is vital when handling refrigerants or any other chemicals involved in the process. Fumes can be harmful if inhaled over time, so good airflow will help mitigate these risks.
Disconnecting the battery is a non-negotiable step before starting any work under the hood. This prevents electrical shocks and protects sensitive electronic components from damage while you’re working on the compressor.
Familiarize yourself with proper disposal methods for old parts and refrigerants. Many regions have specific regulations regarding hazardous waste. By following these guidelines, you’ll keep yourself safe and contribute positively to environmental protection efforts during your VZ Air Conditioning Compressor replacement project.
Preparing Your VZ Air Conditioning Pump for Replacement
Before starting the replacement process, it’s essential to prepare your VZ Air Conditioning Pump properly. Start by parking it on a flat surface and engaging the handbrake. This ensures stability while you work on the vehicle. Ensure you’re in a well-ventilated area, especially since you’ll be dealing with refrigerants.
Next, gather all necessary tools and materials nearby. This might include wrenches, screwdrivers, new compressor oil, and your new air conditioning compressor. Having everything within reach will save time and frustration during the installation process.
Disconnecting the battery is crucial for safety reasons. Remove both terminals to prevent accidental electrical contact while working around sensitive components under the hood.
Familiarize yourself with your vehicle’s layout. Refer to your owner’s manual if needed; understanding where things are located can make removal easier later on. These preparatory steps will set you up for success as you tackle effectively replacing that VZ air conditioning compressor.
Locating the Air Conditioning Compressor
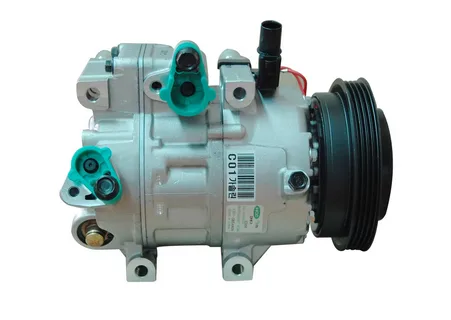
Locating the air conditioning compressor in your VZ Commodore is a crucial step before starting the replacement process. Typically, the compressor is situated on the front of the engine, near the drive belt assembly. This positioning allows it to draw air efficiently and circulate refrigerant through your system.
Look for a cylindrical component with several hoses attached to make identification easier. The compressor will usually be connected to both high-pressure and low-pressure lines. Familiarizing yourself with these parts can save you time as you proceed with removal.
Before getting started, ensure you’ve removed any obstructing components or covers blocking access to this area. You may need to remove some brackets or even temporarily move aside other accessories for better visibility.
Using a flashlight can help illuminate hard-to-see spots while you work under the hood. Make sure you’re comfortable maneuvering around this space; knowing precisely where everything is located will streamline your repair process significantly.
Removing the Old Air Conditioning Compressor
Once you’ve prepared your Air Conditioning Compressor, it’s time to remove the old air conditioning compressor. Start by ensuring that all power is disconnected from the vehicle. This step is crucial for your safety and will prevent accidental electrical issues while working.
Next, locate the bolts securing the compressor in place. Generally, four or more bolts hold it firmly against its mounting bracket. Use a suitable socket wrench and remove these bolts carefully. Keep them somewhere safe; you’ll need them to install the new unit later.
After loosening everything up, gently lift out the old compressor from its position without forcing it too much. Check surrounding components as you do this to avoid damaging anything else in your VZ Commodore’s engine bay.
Preparing the New Compressor for Installation
Before you install your new VZ air conditioning compressor, it’s crucial to prepare the unit properly. Start by inspecting the new compressor for any visible damage. Check for dents or scratches that could affect its performance. Make sure all ports and connections are intact.
Next, familiarize yourself with the manufacturer’s instructions for your new compressor. Each model may have specific requirements or recommendations for installation. It is essential to follow these guidelines closely to ensure optimal functionality.
Apply a thin layer of oil on the O-rings and seals before installation. This helps create a proper seal and prevents leaks when you connect everything later. Using too much oil can lead to complications, so stick to just enough coverage.
Gather any necessary components like mounting brackets or spacers if they didn’t come attached to your new compressor. Having everything ready will streamline the process and reduce downtime during installation. With these steps, you’re set up well for a smooth install.
Installing the New Holden Air Conditioning Compressors
Once your new Holden Air Conditioning Compressors is ready, it’s time to install it. Begin by ensuring that the mounting surface is clean and debris-free. A good seal is essential for optimal performance, so don’t skip this step.
Next, carefully position the new compressor in place. Align it with the bolt holes and ensure all hoses are directed correctly to avoid kinks or bends. Use a torque wrench to secure each bolt according to the manufacturer’s specifications, tightening them gradually in a crisscross pattern for an even distribution of pressure.
Reconnect any electrical connectors that were previously detached during removal. Pay attention here; loose connections can lead to malfunctioning systems later. It’s also wise to check gaskets and seals for wear as you go along—replace them if necessary.
Reconnect the refrigerant lines firmly but gently without overtightening them. Once everything is secured, double-check all connections before recharging your system, which will be next on your list!
Recharging the Air Conditioning System
Preparing for the Recharge Process
After installing the new VZ air conditioning compressor, the next crucial step is to recharge the system. Gather the necessary refrigerant specific to your vehicle, such as R134a, which is commonly used in VZ Commodores.
Attaching the Manifold Gauge Set
Attach a manifold gauge set to the low-pressure and high-pressure service ports of your AC system. This allows you to monitor pressure levels accurately while adding refrigerant to ensure proper operation without overcharging.
Adding Refrigerant to the System
Open the valve on the refrigerant canister and slowly add refrigerant into the system. Keep a close watch on the gauges to achieve optimal pressure readings. Refer to your vehicle’s manual or consult an expert if unsure about the correct amount.
Testing the Air Conditioning System
After recharging, run your AC at maximum settings for several minutes to ensure consistent cold air flow from the vents. Adjust based on the pressure readings to verify the system operates smoothly before sealing any access points.
Testing the New Compressor and Ensuring Proper Functionality
Once the new VZ air conditioning compressor is installed, it’s time to test it. Start your engine and let it run for a few minutes. This allows the system to circulate refrigerant and ensures everything settles into place.
Next, turn on the air conditioning system. Please set it to max cooling and observe how quickly cold air begins to flow from the vents. A properly functioning compressor should deliver chilled air almost immediately. Something may be amiss if there’s any delay or warm air continues blowing.
Listen carefully for any unusual noises from the compressor area while it is operating. You want a smooth hum without rattling or grinding sounds that could indicate internal issues or improper installation.
After running the AC for about 10-15 minutes, inspect under the hood closely for leaks around hoses and connections. Any signs of refrigerant leakage can lead to further problems, so addressing them early is crucial for maintaining your vehicle’s comfort during hot weather.
Conclusion
Replacing the air conditioning compressor in a VZ Commodore can seem daunting, but it becomes manageable with the right tools and knowledge. Completing this task yourself is rewarding, and you save on labor costs.
Attention to detail is crucial throughout the process. From safety precautions to proper installation techniques, every step contributes to your vehicle’s performance and longevity. Ensuring each component functions well together will lead to a more efficient system.
Don’t overlook testing after installation. This final check confirms everything operates smoothly and helps avoid future problems. A well-functioning compressor not only cools efficiently but also enhances overall driving comfort.
With patience and persistence, tackling this project can be an empowering experience for any car enthusiast or DIYer. Enjoy the fresh air as you drive your newly conditioned VZ Commodore down the road!
FAQs
What signs indicate that my VZ Commodore’s air conditioning compressor needs replacement?
Common signs include strange noises when the AC is on, reduced cooling efficiency, or no compressor engagement. If you’re experiencing any of these issues, it’s time to investigate further.
How long does it take to replace an air conditioning compressor in a VZ Commodore?
The process can typically take 3 to 5 hours, depending on your mechanical skill level and whether you encounter any unexpected challenges.
Can I replace the air conditioning compressor myself?
You can attempt this task yourself if you have basic mechanical skills and tools. However, follow safety precautions and refer to your vehicle’s manual for specific guidance.
Do I need special tools for this job?
Yes. For proper installation specifications, commonly required tools include wrenches, screwdrivers, pliers, and torque wrenches. Make sure you’re equipped before starting.
| Related Business Listings |
| Contact Directory |
| Local Business Profiles |