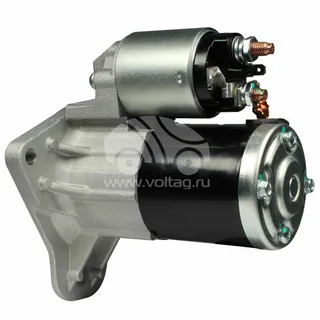
If you own a BF XR6, chances are you’ve developed a deep connection with your ride. But what happens when the starter motor starts to falter? Instead of heading to the mechanic and breaking the bank, why not tackle this repair yourself? With just a few tools and patience, you can replace that troublesome Bf Xr6 Starter Motor and get back on the road quickly. This DIY guide will walk you through each step of the process, making it accessible even for beginners. Say goodbye to costly repairs and hello to hands-on experience with your beloved Ford! Let’s dive into how you can embrace this challenge confidently.
Tools and Materials Needed
Before you replace your starter motor, it’s essential to gather the right tools and materials. Start with basic hand tools like a socket wrench set, which includes various sizes to fit different bolts. A ratchet extension can also be handy for reaching tight spots.
To remove any covers or connectors that might obstruct access, you’ll need a flathead screwdriver and a Phillips screwdriver. Pliers are great for gripping wires if required, while a torque wrench will help ensure everything is tightened correctly once it’s reassembled.
Remember safety equipment! Gloves will protect your hands from sharp edges and grime, while safety glasses will shield your eyes from debris.
As for materials, you’ll need the new starter motor explicitly suited for the BF XR6 model; check compatibility before purchasing. You may also want electrical cleaner spray to keep connections clean during installation.
Have some rags to wipe away dirt or oil as you work. With this collection ready to go, you’re all set to make this project smoother and more efficient!
Safety Precautions
Safety is paramount when replacing the BF XR6. Before you start, ensure you’re working in a well-ventilated area. This helps to avoid inhaling harmful fumes and reduces the risk of fire hazards.
Always wear protective gear. Safety goggles shield your eyes from sparks and debris, while gloves protect your hands from cuts or electrical shocks. Sturdy footwear can help prevent injuries if tools or heavy components fall.
Disconnect the battery before beginning any work on your vehicle’s electrical system. A simple mistake can lead to short circuits or shocking experiences you’ll want to avoid at all costs. Permanently remove the negative terminal first; this minimizes risks during reassembly.
Keep your workspace clean and organized as you work on the starter motor replacement process. Tools scattered around can lead to accidents, so gather everything you need beforehand and put items back after use.
Be cautious about moving parts under the hood. Ensure no one is near while you’re working on it—especially children or pets—and take breaks to stay focused and alert throughout the task.
Preparing Your Vehicle: Ford Falcon Xr6 Starter Motor
Preparing your vehicle for a Ford Falcon Xr6 Starter Motor replacement is essential. Start by ensuring you park on a flat surface, ideally in a well-lit area or garage. This will make the entire process smoother and safer.
Next, you’ll need to disconnect the battery. First, permanently remove the negative terminal to avoid any electrical shorts. It’s crucial to keep safety at the forefront during this step. Once disconnected, it’s wise to let the car sit for a few minutes before proceeding.
Check your toolbox and gather all necessary tools and materials beforehand. You don’t want to scramble midway through; having everything ready can save time and frustration later.
If you’re working from underneath your vehicle, ensure enough room. If you’re using jack stands, position them securely for maximum stability while you work.
Please take a moment to identify where your starter motor is located in the BF XR6 engine bay. Then, familiarize yourself with the surrounding components to determine what needs removal or adjustment as you replace them.
Removing the Old Starter Motor
Removing the old starter motor from your BF XR6 can seem daunting, but it’s a straightforward process. First, disconnect the battery to prevent electrical mishaps during removal. It’s crucial to ensure safety first.
Next, locate the starter motor beneath your vehicle. You may need to raise it carefully using jack stands for better access. Once you have a clear view, identify and remove any protective covers or shields blocking your way.
It’s time to detach the wiring harness connected to the starter motor. Carefully unscrew and unplug all connections—note where each wire goes for easier reinstallation later. A little labelling with tape can save headaches down the road.
After removing these connections, look for mounting bolts that secure the starter. Two or three bolts usually hold it firmly; use a socket wrench to loosen them gently but steadily.
Once all bolts are removed, wiggle and pull out the old starter motor from its position. If it feels stuck, check if there’s anything else still attached before pulling too hard. With patience and care, you’ll soon have it freed up for disposal or recycling.
Installing the New Starter Motor
Begin by positioning the new Fg Falcon Starter Motor in place. Carefully align it with the mounting holes on the engine block. This step requires a steady hand, as misalignment can lead to difficulties during installation.
Once aligned, gently insert the bolts through the starter motor’s mounting holes into the corresponding threads on your BF XR6. Start all bolts by hand to avoid cross-threading. Once they’re seated, you can use a socket wrench to secure them firmly, but don’t overtighten just yet.
Before tightening, ultimately, reconnect any necessary wiring harnesses that were removed earlier. Be sure each connector clicks into place securely; loose connections could cause issues later.
Next, reattach any protective covers or shields removed for access during this process. These components are essential in protecting your starter and ensuring optimal performance.
Take one last look at everything you’ve connected and secured before moving on to testing your work. It is crucial to ensure that every part is installed correctly for smooth operation and longevity of your new BF XR6.
Reconnecting Components
After successfully installing the new starter motor, it’s time to reconnect all the components you previously disconnected. This step is crucial for ensuring everything functions properly once your BF XR6 is back together.
Reattaching Electrical Connections
Begin by reattaching the electrical connections to the starter motor. Make sure each wire goes back into its original position. A loose connection can cause the starter to fail or even damage other parts of your vehicle.
Securing Brackets and Bolts
Next, remember any brackets or bolts that hold the starter motor securely in place. These are essential for stabilizing the motor during operation and should be tightened according to the specifications in your service manual.
Checking for Wear and Damage
Once everything is connected and secured, check all wiring around the area for signs of wear or damage. It’s better to address these issues now than face problems later when you try to start your car.
Testing the New Ba Falcon Starter Motor
Once the new Ba Falcon Starter Motor is installed, it’s time to put it to the test. Start by ensuring everything is securely connected. Double-check all wires and bolts before proceeding; you don’t want surprises.
Next, reattach your car battery’s negative terminal. This step is crucial because there won’t be anything to start without power. Ensure the connection is tight but not overly so; we don’t want damage here.
Now, it’s time for a trial run. Turn the ignition key and listen closely as the engine attempts to start. A smooth crank indicates success, while grinding or clicking sounds may point toward installation issues.
If your Starter Motor fires up without trouble, great! Let it idle for a few minutes to ensure everything operates smoothly under normal conditions. Pay attention to any unusual noises or vibrations during this period.
If possible, take your vehicle for a short drive around the block. This will help confirm that the starter motor functions well in different scenarios and under load conditions—important factors when assessing performance.
Conclusion
Replacing the Bf Xr6 Starter Motor can be a rewarding experience. It can save you money on labour costs and enhance your understanding of your vehicle’s mechanics. Taking on this DIY project empowers you as a car owner. You gain valuable skills while ensuring that every component is installed correctly. Plus, it’s satisfying to hear that engine roar back to life with a new starter motor. Always remember that attention to detail is crucial during the installation process. Double-check all connections and ensure everything is securely fastened before testing the new unit.
FAQs
What tools will I need to replace my BF XR6 starter motor?
Bf Xr6 Starter Motor typically require a socket set, wrenches, screwdrivers, and pliers. Having an extension bar is also helpful for those hard-to-reach bolts.
How long does replacing a starter motor in a BF XR6 take?
Depending on your experience level and any unforeseen complications, the job can be completed in 2 to 4 hours.
Can I use aftermarket parts for my starter motor replacement?
Yes, aftermarket parts can be used if they meet OEM specifications. Just ensure they’re from reputable manufacturers to avoid quality issues.
| Related Business Listings |
| Contact Directory |
| Local Business Profiles |